


August and September 2013. Things have slowed up a bit during the summer for the usual reasons - including a week in Grosmont, close to the North York Moors Railway. A very pleasant week, and their Pullman diner has a lot to recommend it - excellent food while steaming through the countryside.
We had hoped to get all four baseboards laid and wired by the end of September, but have not been able to get this far unfortunately. We have however built the four baseboards, and laid/ballasted the track on the third. This baseboard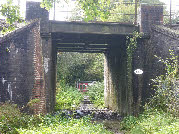
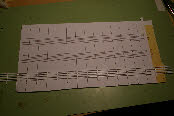
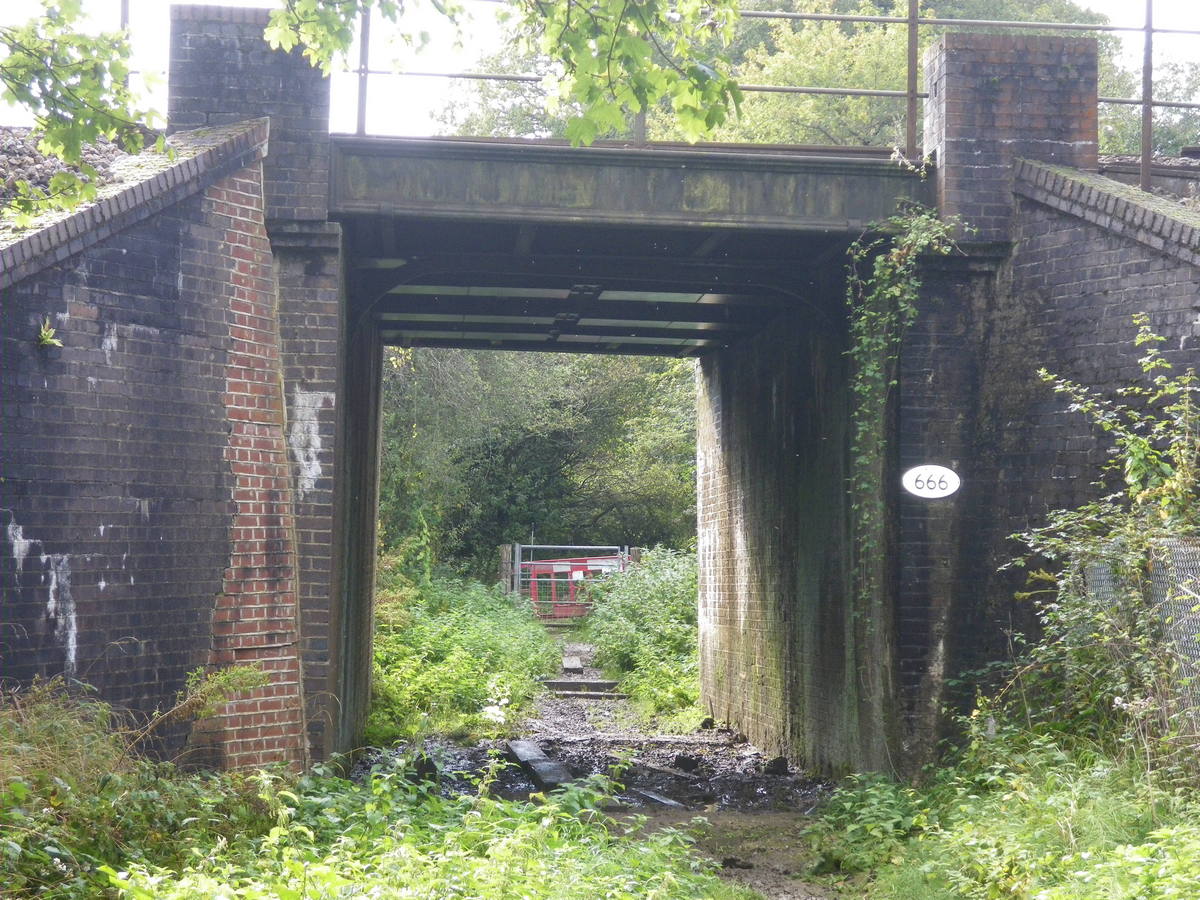
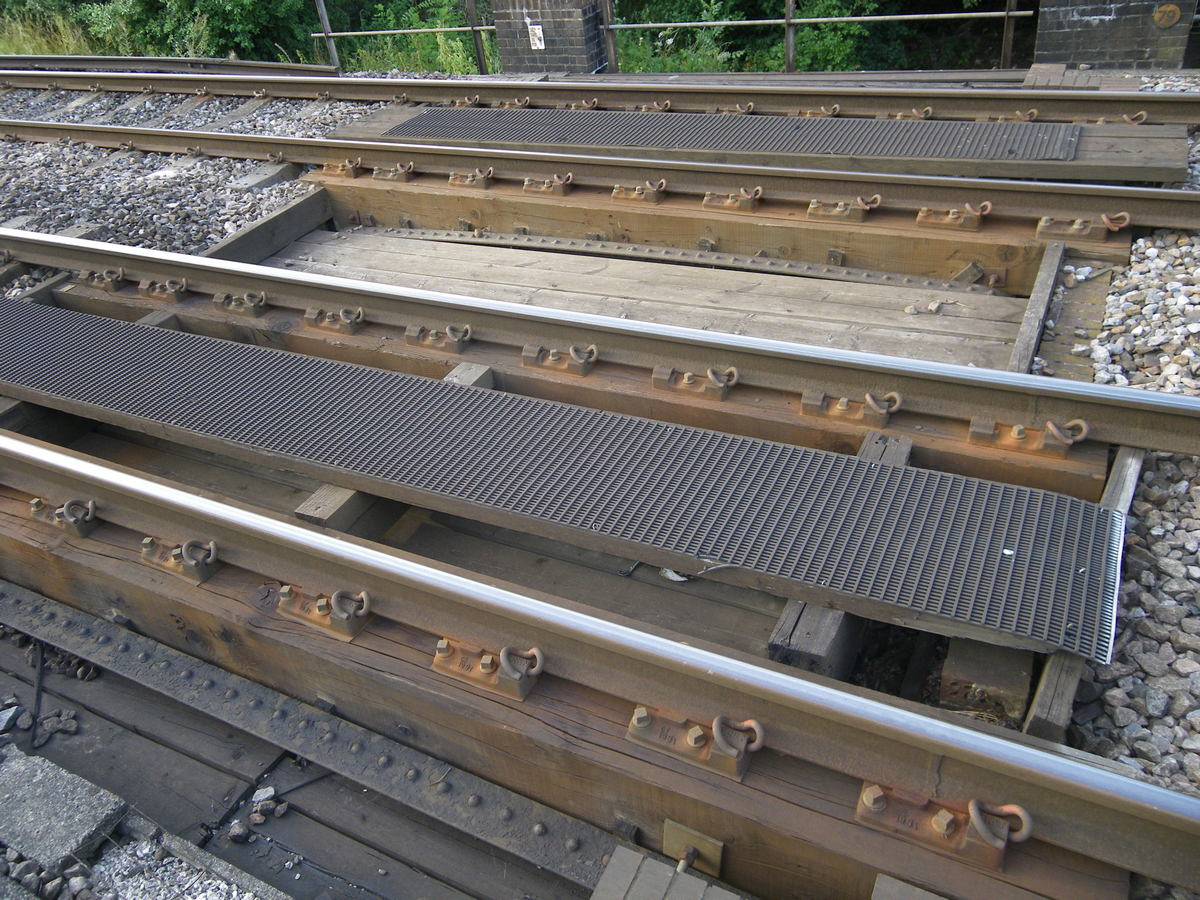
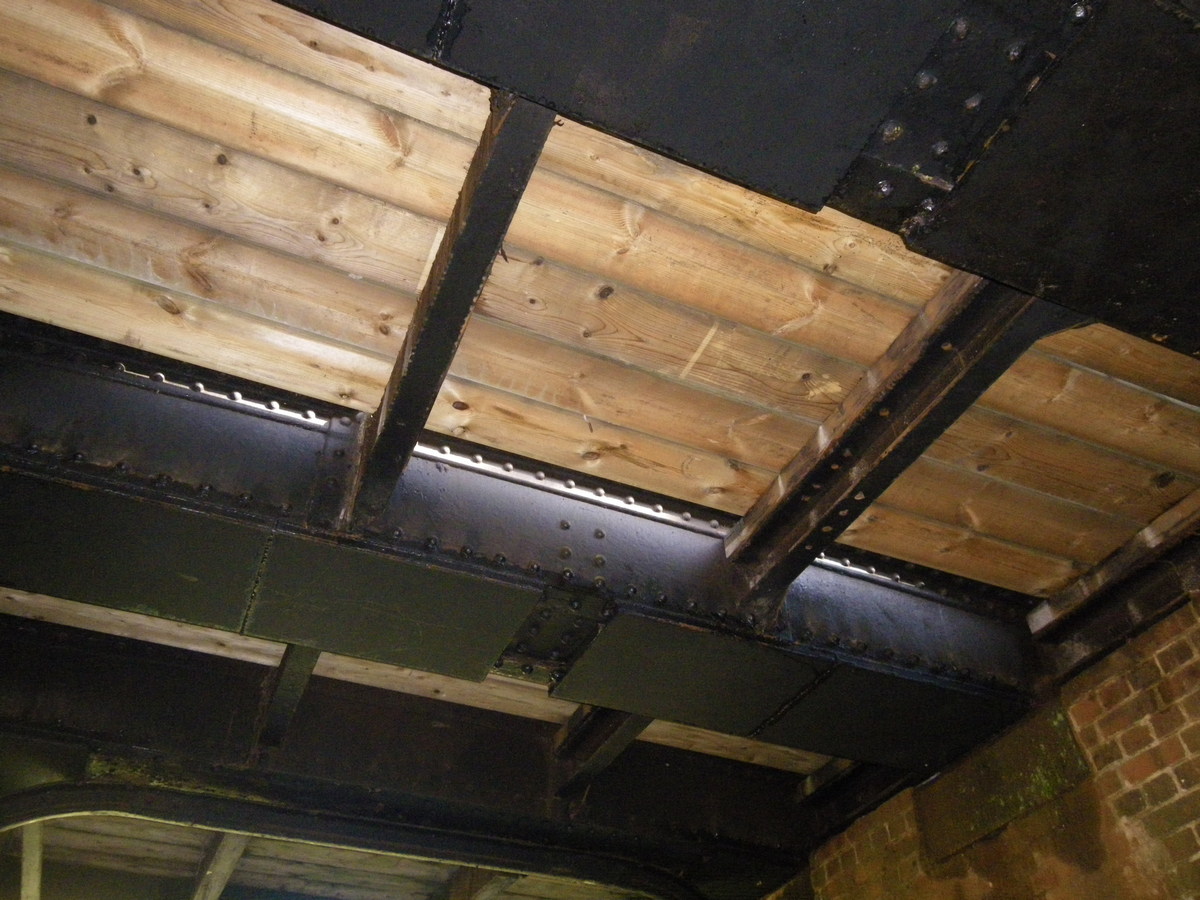
 incorporates an accommodation crossing for the Green Lane which crosses the line west of the station. The photographs show the real thing, and as can be seen it’s quite complex -
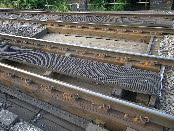
 wrought iron beams bridging the gap, with baulk timber trackwork on top. The real thing only has two lines over it, but because we’ve adjusted the track plan a bit, our crossing has four tracks.
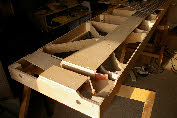
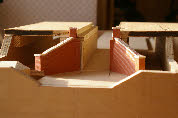
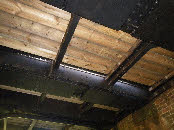
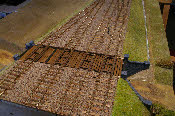
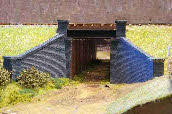
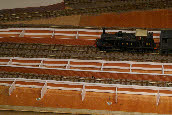
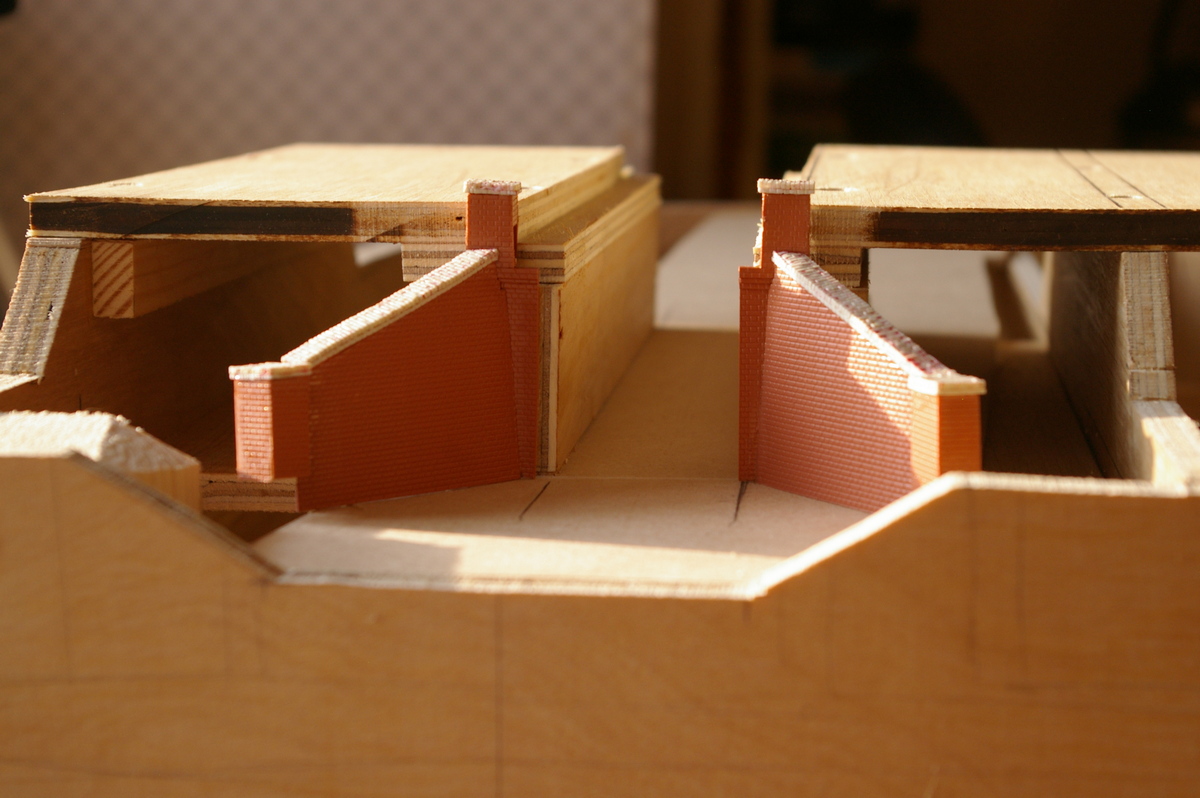
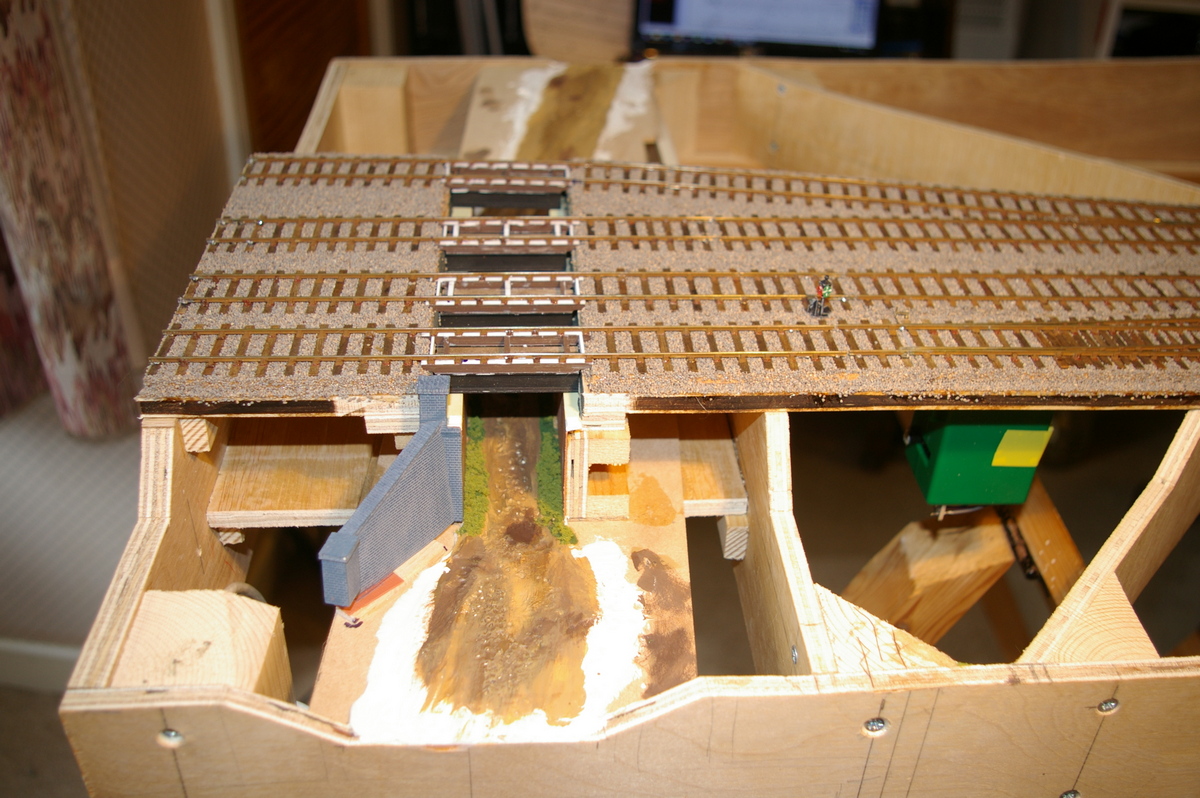
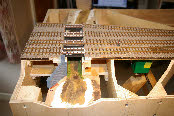 Once the track is laid there will be no access underneath the bridge, so we’ve had to finish the scenic work under the bridge before laying the track. The photos on the left show the basic structure of the baseboard, with the wingwalls temporarily in place before painting. The photo on the right shows the beams and baulk timbers in place, with all the track laid on top. and basic scenic work underneath. There is still a lot.of work to do on top of the bridge.
The next task is to wire up this board - all the Tortoise motors are in place and ready to go.
As described last month, we’re having a rethink about ground signals. We’ve made all ten signals needed for the layout, and devised what I hope is an improved method of operation, going back to the Fulgarex motors we used for Pulborough, but (I hope) in a rather better configuration. More on this when I’ve sorted things out a bit more.
The main difficulty with the final baseboard will be the level crossing. We’ve started looking at various ways of motorising the gates, but haven’t yet hit on anything that I’m convinced by. The gates are still in place and operated from a capstan in the adjacent box. (Network Rail intend to replace them next year with barriers, much against the wishes of the village).
When the gates are opened or closed, they start to move at slightly different times, move at different speeds, and reach the end of their travel at slightly different times - presumably as a result of wear and slop in the mechanism, and no doubt by how much effort the signalman applies. I would quite like to replicate this rather quirky motion if I can. One option which I haven’t yet looked at is servos, and the accompanying electronics. Do these servos travel through more than 90deg? (The crossing is heavily skewed so that one half of each pair of gates moves through more than 90deg, and the other half less). Can the speed of operation of the servos be tuned to replicate the different closing time for each gate? More research needed........
October 2013. A handful of major milestones have been reach in October. All the track has now been laid, and has all been wired up. All the turnout motors have been fitted and are operational from the lever frame. All the ground signals have been fitted, and seven of the ten are functional. All the AJ magnets have been fitted, and are functional.
Needless to say, the track needs a bit of adjustment in various places, due to minor misalignments during track laying. Many of the point blades require a little attention - a light dressing with a riffler file to sharpen the points. However, on the whole, we’re pleased with the trackwork, and everything is running reasonably well even before final fettling.
We’ve started work on filling in the open plan baseboards, and will hopefully be starting on scenery very shortly.
November 2013. This month has seen a bit of a transformation in the layout. Having completed the trackwork last month, we have now started on the scenery, starting with the London end.
The first stage has been to fill in the open-plan base boards with a mixture of 3mm mdf for the flattish bits, and card for the rest - embankments etc. On top of this we have laid a generous and uneven thickness of artex mixed with PVA to give a little texture to what will be open fields in the finished scheme of things. This has all been done very quickly, and I forgot to take any photos - I’ll take some when we repeat the process for the Lewes end of the layout.
I’ve painted the white artex an earth colour to make sure no white shows through when finished. For the grass we have invested in one of the FMR static grass applicators. Some makes of these machines are ridiculously expensive at £100 and upwards, whereas the FMR machine is about £30 depending on which size you buy. I bought the larger size, but I think for what I’m doing (about 16sq ft of grass) the smaller one would have been perfectly adequate.
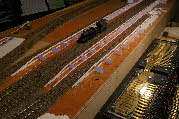
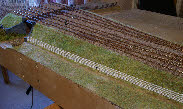 The technique for using these machines is very simple, and there are several YouTube videos demonstrating how they work. It took about 2 hours to cover a 10 ft length of embankment, so it’s quick to do, and the end result is very satisfying -
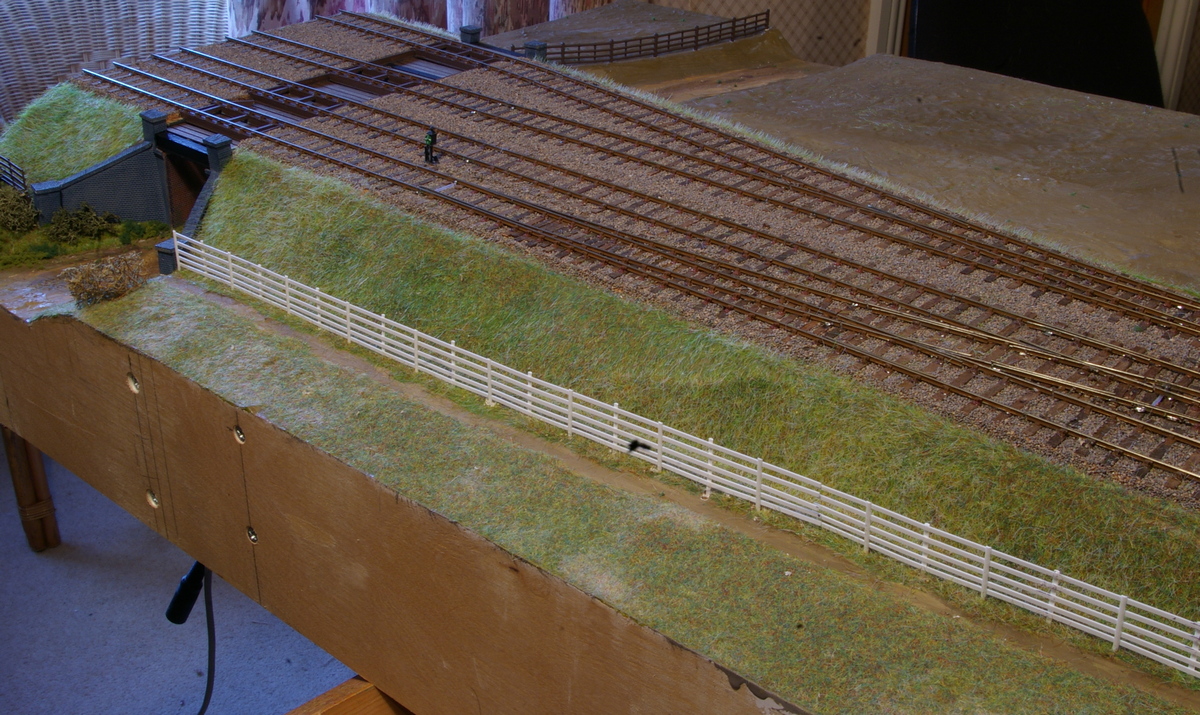
 the best grass I’ve been able to produce in 30 years of modelling. As with all things in nature there is no consistency of colour in grass, so we’ve used about six different shades and mixed in random, varying proportions (two colours at a time) to give what I hope looks like natural variation.
An important part of the rural scene is the railway lineside fencing, and inevitably there are no manufacturers of LBSC fencing, which is somewhat unusual - five rails, more closely spaced at the bottom than the top, and half round posts on alternate sides every 5ft or so. The photo above shows some embryonic fencing at ‘first-fit’ stage, awaiting painting, and final joining together into one single length.
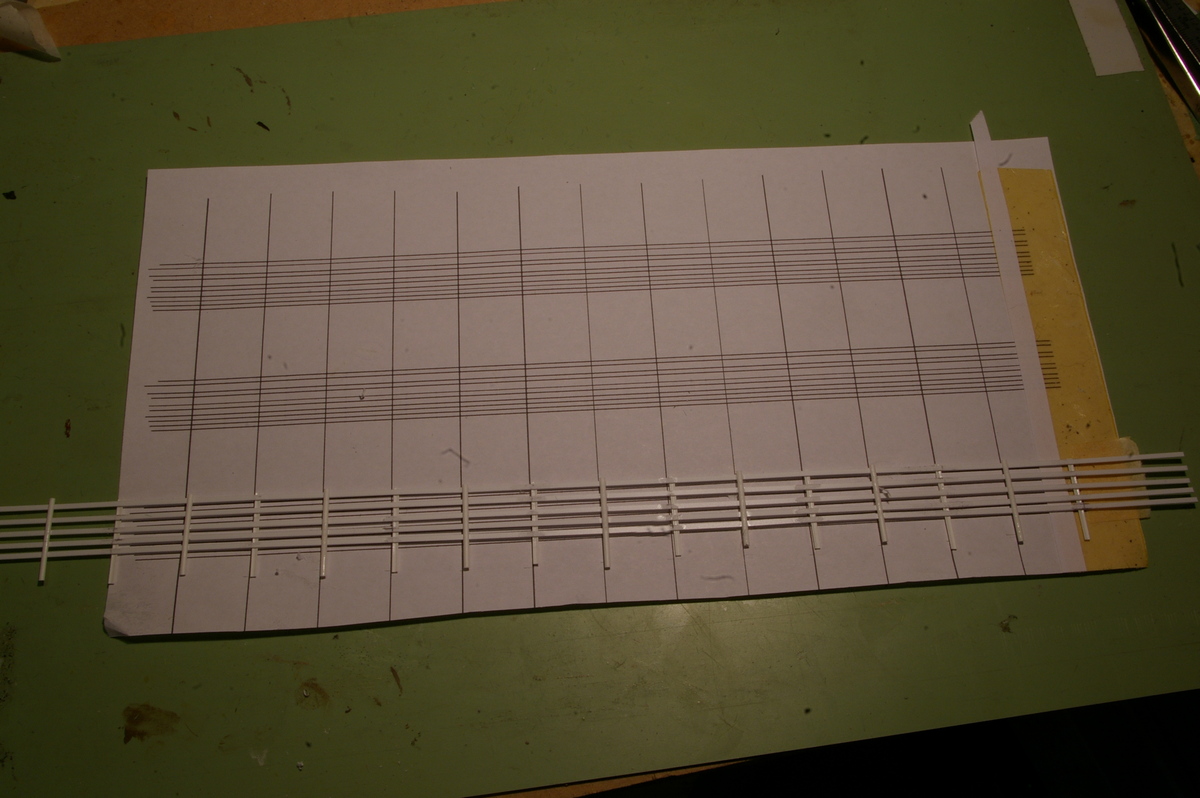
 Last time I made some of this fencing, for Pulborough, I had to make the half round posts, which was very tedious. This time Evergreen plastic comes to the rescue, and I have been able to buy the components I need. I have made a simple drawing of the fence on CorelDraw, taped the rails to the drawing, and cemented on the posts -
 an evening’s work to make five 12 inch lengths of fencing. Another 15 or so to make......
We’ve started making a few small trees and bushes, and this has forced me to make a decision about what season to model. The autumn colours this year are fantastic - bright yellows and oranges, plus a few trees still in leaf, and a few others completely stripped of leaves. So that’s decided - autumn. The only problem is that I have no autumn foliage, so back to the internet to find a supplier of Woodland Scenics, and wait for delivery.
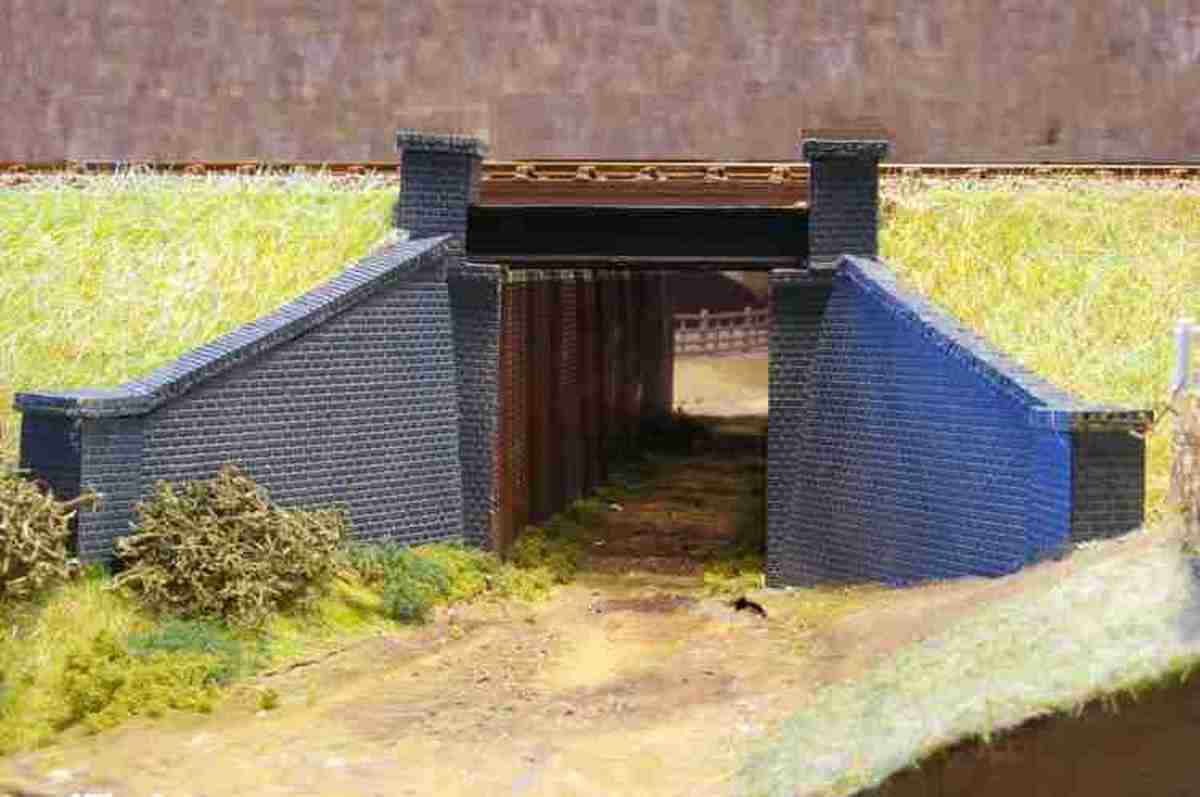
 The over-
bridge is now more or less complete, awaiting just some hand-railing, weathering, and a little minor detailing. It’s a bit bland at present, but will be much improved with some dry brushed white highlights to pick out some of the detail. We’ve started to add a few small bushes around the tunnel entrance but need the autumn Woodland Scenics material to finish these.
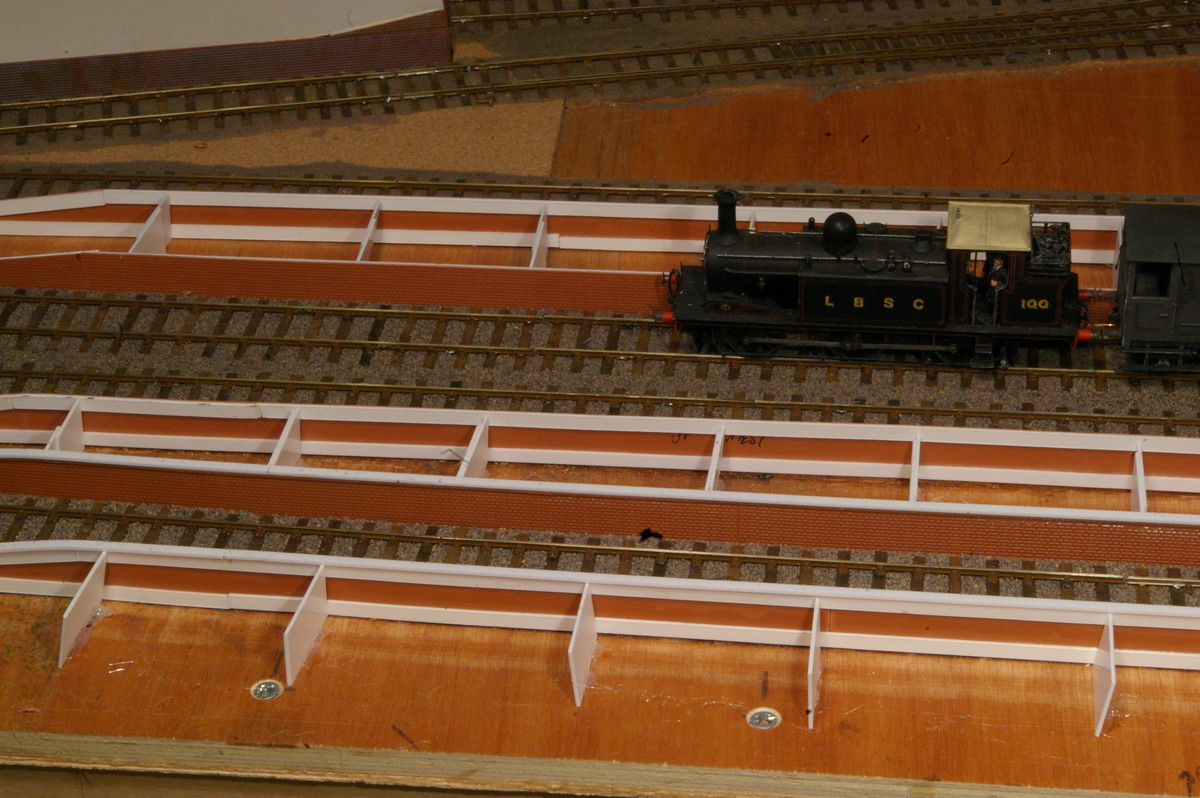
 Once the scenic work on the London end is finished we’ll be moving eastward to the station area, and the platforms. We’ve made all the platform faces from Slaters brickwork, and completed some of the corbelling, and the brick edging to the platform. However, the platform surface has been exercising me. All the photos I have seen, seem to show a tarmac surface -
 certainly not gravel or bare earth. The period around 1900 seems quite early for this, given that the road surface in Plumpton was little more than a muddy track at the time. I can only presume that, because of the adjacent race-course, Plumpton would have been quite busy at times, and therefore warranted a decent surface on its platforms.
The question is how to replicate tarmac? One of the most promising solutions I’ve come across is fine wet-and-dry paper, subtly painted to give variation in colour without covering the texture. We also have the problem of what to use for the structure of the platform top, under the paper. If we use plastic, I’m not sure I can get a reliable bond to the paper, but if I use card, I will have to use a lot of support underneath to stop it sagging. On the other hand I’ve got quite a lot of 1mm ply. I think some experimentation is called for.
We had hoped to get all four baseboards laid and wired by the end of September, but have not been able to get this far unfortunately. We have however built the four baseboards, and laid/ballasted the track on the third. This baseboard
 incorporates an accommodation crossing for the Green Lane which crosses the line west of the station. The photographs show the real thing, and as can be seen it’s quite complex -
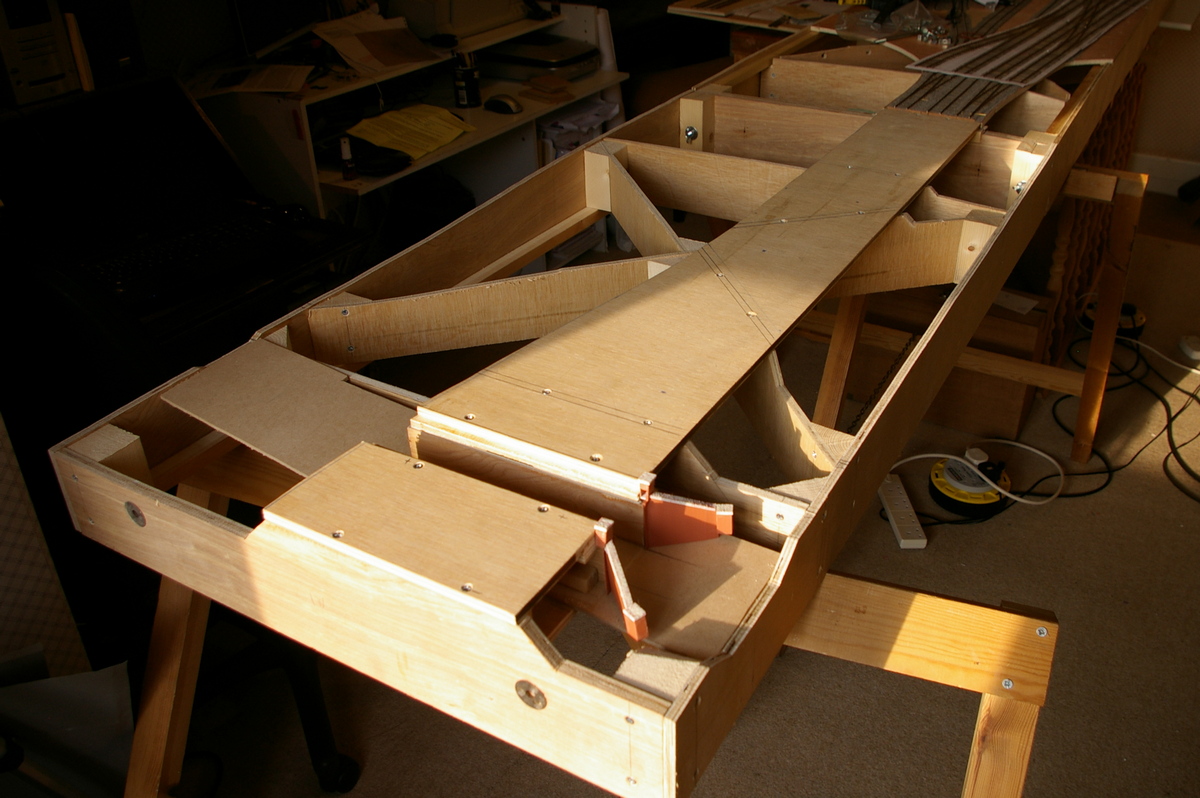
 Once the track is laid there will be no access underneath the bridge, so we’ve had to finish the scenic work under the bridge before laying the track. The photos on the left show the basic structure of the baseboard, with the wingwalls temporarily in place before painting. The photo on the right shows the beams and baulk timbers in place, with all the track laid on top. and basic scenic work underneath. There is still a lot.of work to do on top of the bridge.
The next task is to wire up this board -
As described last month, we’re having a rethink about ground signals. We’ve made all ten signals needed for the layout, and devised what I hope is an improved method of operation, going back to the Fulgarex motors we used for Pulborough, but (I hope) in a rather better configuration. More on this when I’ve sorted things out a bit more.
The main difficulty with the final baseboard will be the level crossing. We’ve started looking at various ways of motorising the gates, but haven’t yet hit on anything that I’m convinced by. The gates are still in place and operated from a capstan in the adjacent box. (Network Rail intend to replace them next year with barriers, much against the wishes of the village).
When the gates are opened or closed, they start to move at slightly different times, move at different speeds, and reach the end of their travel at slightly different times -
October 2013. A handful of major milestones have been reach in October. All the track has now been laid, and has all been wired up. All the turnout motors have been fitted and are operational from the lever frame. All the ground signals have been fitted, and seven of the ten are functional. All the AJ magnets have been fitted, and are functional.
Needless to say, the track needs a bit of adjustment in various places, due to minor misalignments during track laying. Many of the point blades require a little attention -
We’ve started work on filling in the open plan baseboards, and will hopefully be starting on scenery very shortly.
November 2013. This month has seen a bit of a transformation in the layout. Having completed the trackwork last month, we have now started on the scenery, starting with the London end.
The first stage has been to fill in the open-
I’ve painted the white artex an earth colour to make sure no white shows through when finished. For the grass we have invested in one of the FMR static grass applicators. Some makes of these machines are ridiculously expensive at £100 and upwards, whereas the FMR machine is about £30 depending on which size you buy. I bought the larger size, but I think for what I’m doing (about 16sq ft of grass) the smaller one would have been perfectly adequate.
 The technique for using these machines is very simple, and there are several YouTube videos demonstrating how they work. It took about 2 hours to cover a 10 ft length of embankment, so it’s quick to do, and the end result is very satisfying -
An important part of the rural scene is the railway lineside fencing, and inevitably there are no manufacturers of LBSC fencing, which is somewhat unusual -
 Last time I made some of this fencing, for Pulborough, I had to make the half round posts, which was very tedious. This time Evergreen plastic comes to the rescue, and I have been able to buy the components I need. I have made a simple drawing of the fence on CorelDraw, taped the rails to the drawing, and cemented on the posts -
We’ve started making a few small trees and bushes, and this has forced me to make a decision about what season to model. The autumn colours this year are fantastic -

 The over-
 Once the scenic work on the London end is finished we’ll be moving eastward to the station area, and the platforms. We’ve made all the platform faces from Slaters brickwork, and completed some of the corbelling, and the brick edging to the platform. However, the platform surface has been exercising me. All the photos I have seen, seem to show a tarmac surface -
The question is how to replicate tarmac? One of the most promising solutions I’ve come across is fine wet-